
How to Do Joinery: A Look at How Professionals Approach the Trade
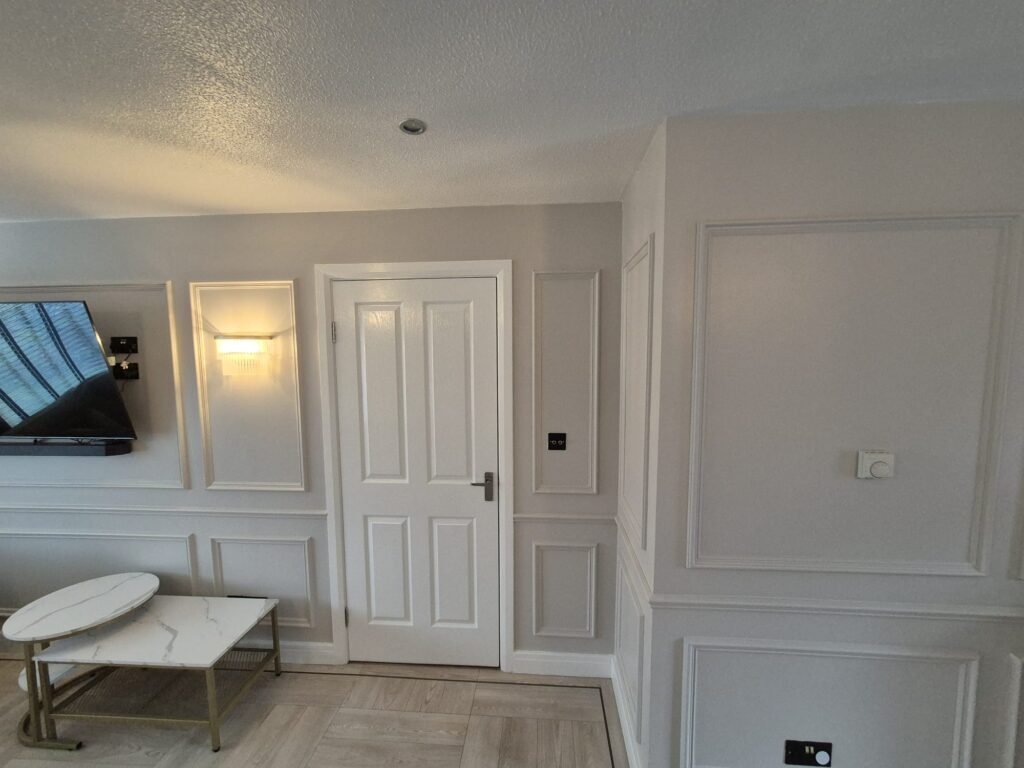
Joinery is the craft of building and connecting pieces of wood into furniture, fittings, and structures, using specific joints chosen to match the strength, appearance, and durability each project needs. Learning how to do joinery properly is less about mastering one single technique, and more about understanding how professionals think through a project from start to finish: choosing the right timber, the right joint, and the right level of precision for the job in front of them. At Craig Smith Joinery, we’ve spent 30 years approaching every project this way. This guide walks through how professional joiners genuinely approach their work, including one simple joint you can try yourself with basic tools, so you get a real sense of what the trade involves, whether you’re curious about the craft or thinking about trying some woodworking yourself. How Professional Joiners Actually Think About a Project Before any wood is cut, an experienced joiner works through a few key questions on every project, and understanding this thought process is really the foundation of “how to do joinery” properly, regardless of skill level. What Will This Piece Need to Withstand? Every joint faces different types of stress. A shelf carries a steady, even weight. A chair leg faces twisting and repeated movement. A kitchen cabinet deals with heat, steam, and daily use. Professionals start by understanding what forces a joint will actually face, since this shapes every decision that follows. What Timber Suits This Job? Different timbers vary considerably in hardness, durability, and how well they take different joints. A professional considers whether the piece needs a durable hardwood, a more affordable softwood, or something in between, based on how the finished piece will be used and how long it needs to last. Which Joint Genuinely Fits the Need? This is where professional experience shows most clearly. Rather than defaulting to one favourite joint, a skilled joiner matches the joint to the specific part of the project: a fast, simple joint where speed and cost matter more, a stronger joint where real strength is required, and sometimes a visible, decorative joint where craftsmanship itself is part of the design. How Much Precision Does This Step Need? Some parts of a project tolerate small imperfections without any real consequence. Others, like a scribed fit against an uneven wall or a mortise and tenon joint in a chair leg, need real precision to perform properly over time. Professionals learn to recognise which steps genuinely demand extra care, and where a faster approach is perfectly reasonable. Working through these four questions in order is really the heart of professional judgement. It’s tempting to think that skilled joinery is mostly about hand skills, cutting cleanly, drilling accurately, fitting joints snugly, but the truth is that most of the quality in a finished piece is actually decided before a single cut is made, in exactly this planning stage. The Tools Behind Everyday Joinery Work Professional workshops use a wide range of specialist machinery, but many of the fundamental techniques in joinery can be practised with tools that are genuinely accessible to most people: You don’t need professional grade machinery to start understanding basic joinery, but the principles behind using these tools accurately, patiently, and consistently are exactly what separates a strong joint from a weak one, regardless of the equipment involved. It’s worth noting that many of these tools are genuinely dual purpose around the average home already. A drill and a set of clamps, for example, are common enough that a lot of people already own the basics needed to try a first simple joint without any significant new investment. A Simple Joint to Try: The Dowel Joint If you want a genuine sense of how joinery works in practice, a dowel joint is a good, accessible starting point, since it only needs a drill, some dowels, glue, and clamps. What You’ll Need Step-by-Step This single exercise teaches several genuine joinery fundamentals at once: precise marking, accurate drilling, and the patience needed to let glue cure properly rather than rushing to use the piece too soon. If this first attempt goes well, it’s worth building on it gradually rather than jumping straight to something far more ambitious. A simple shelf or small box using the same dowel technique is a sensible next step, letting you practise the same fundamentals across a slightly larger, slightly more demanding project before attempting anything genuinely load bearing or structural. Common Beginner Mistakes to Watch Out For A few mistakes come up often for people trying joinery for the first time, and knowing them in advance helps avoid frustration: Most of these come down to patience rather than skill, and they’re exactly the kind of thing that improves quickly with practice. It’s genuinely reassuring to know that almost every one of these mistakes is fixable through slowing down, rather than requiring some special talent that takes years to acquire. Why Precision Matters More Than Expensive Tools It’s worth saying clearly: good joinery comes far more from patience and precision than from having professional grade equipment. A carefully marked, carefully drilled dowel joint made with basic tools will genuinely outperform a rushed joint made with expensive machinery. This is true at every level of the trade, from a first attempt at home through to a professional workshop, and it’s really the most important principle behind learning how to do joinery properly. This is a genuinely encouraging point for anyone starting out. It means the biggest barrier to producing a strong, well made joint isn’t your toolkit, it’s the discipline to slow down at exactly the points where precision matters most, particularly marking out and drilling or cutting. Tools can help, but they can’t substitute for care taken at these key stages. Knowing When a Job Genuinely Needs a Professional This is perhaps the most important thing to take away if you’re considering DIY joinery. Simple joints, like the dowel joint above, on small, low stakes projects, are genuinely realistic to learn and
Does Joinery Do Roofs? What Joiners Actually Cover
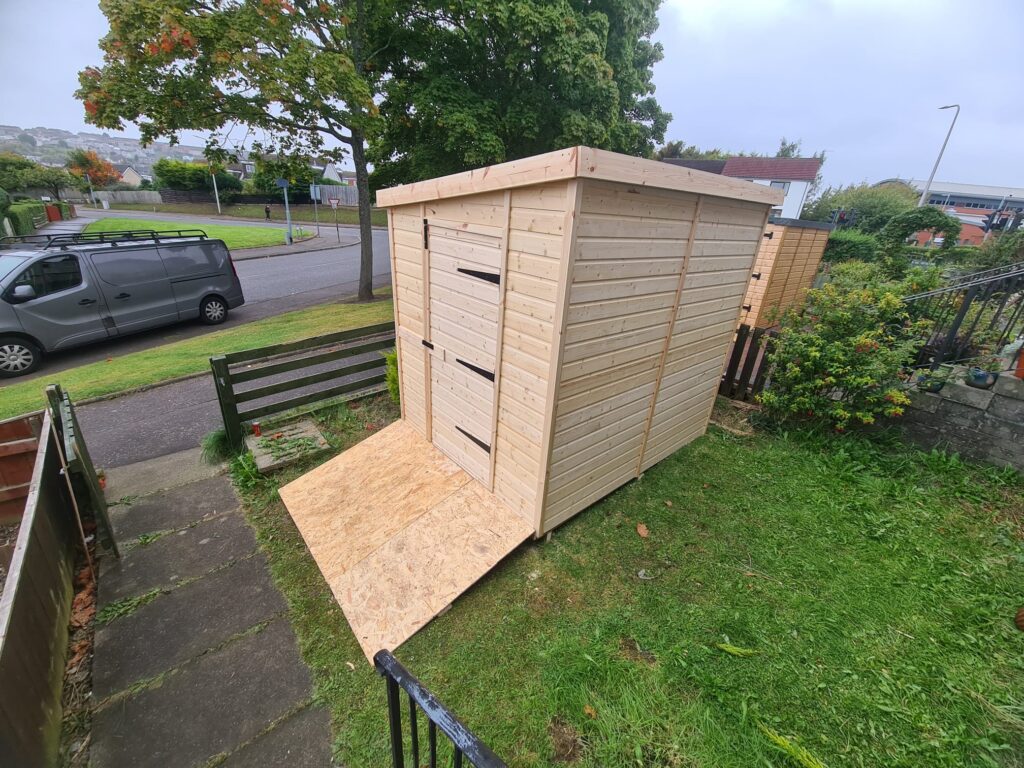
Joinery generally doesn’t cover structural roofing work, like installing rafters, roof trusses, or laying tiles, that falls under roofing and structural carpentry trades. However, joiners commonly work on the timber elements around the edge of a roof, such as fascias, soffits, and bargeboards, which sit right at the boundary between structural roofing and finish joinery. At Craig Smith Joinery, we take on this kind of roof-adjacent joinery regularly, without getting involved in structural roofing itself. This guide explains clearly where joinery ends and roofing begins, what a joiner typically can and can’t help with when it comes to roofs, and where our own work fits into that picture. Joinery vs Roofing: Two Different Trades It’s worth being upfront about this distinction, since the terms can genuinely overlap in people’s minds, even though they describe quite different work. Roofing covers the structural and weatherproofing elements of a roof itself, the trusses or rafters that form its shape, the tiles, slates, or sheet materials that keep water out, and the underlying structure that holds everything together and supports the roof’s weight. This is specialist structural work, usually carried out by roofers or structural carpenters, and it comes with its own safety standards and building regulations, particularly around load-bearing capacity and weatherproofing. Joinery, by contrast, focuses on precision timber work, cutting, shaping, and fitting wood into finished, often visible components. Joiners are skilled at building and fitting things like doors, windows, staircases, and fitted cabinetry, along with certain timber elements that sit around a building’s exterior, including some parts near the roofline. The overlap between the two trades happens specifically at the edges of a roof, where structural roofing meets finished, visible timber detailing, which is exactly where joinery work like fascias, soffits, and bargeboards comes in. This isn’t just a matter of terminology either. The two trades genuinely require different skills, different tools, and different working practices. A roofer works predominantly at height, dealing with weatherproofing membranes, tiling patterns, and structural load calculations. A joiner works with fine measurement, precise cutting, and finished timber detailing. Both skill sets can be needed on the same building at the same time, but they’re rarely interchangeable. What Are Fascias, Soffits, and Bargeboards? These three elements sit at the edge of a roof and are commonly worked on by joiners, even though they’re not part of the structural roof itself. Fascias A fascia is the horizontal board fixed along the lower edge of a roof, where the roof meets the outer walls of a building. It typically supports the guttering and provides a finished edge to the roofline, covering the ends of the roof rafters and giving the roof a clean, tidy appearance from the outside. Soffits A soffit is the board fitted underneath the fascia, covering the underside of the roof overhang. Soffits often include ventilation to allow air to circulate in the roof space, which helps prevent damp and condensation problems within the roof structure itself. Bargeboards A bargeboard is similar to a fascia but runs along the sloped edge of a gable roof, rather than the horizontal eaves. It provides a similar finished, protective edge along the sloping sides of the roof. All three of these elements are timber, or sometimes timber-alternative materials like uPVC, precisely cut and fitted, which is exactly why this work suits a joiner’s skill set, even though it’s positioned right at the edge of the roof structure. It’s worth adding that these components do more than simply look tidy. A soffit’s ventilation, for example, plays a genuine role in preventing damp and rot within the roof space, by allowing air to move through and reduce condensation build-up. A fascia that’s properly fitted and supported also keeps guttering securely positioned, which matters for directing rainwater safely away from the building rather than allowing it to pool against the walls or foundations. Where Joinery Work Fits Around a Roof Element Structural Roofing or Joinery? Typical Trade Roof trusses/rafters Structural roofing Roofer/structural carpenter Roof tiles/slates Structural roofing Roofer Fascias Joinery Joiner Soffits Joinery Joiner Bargeboards Joinery Joiner Roof windows/dormers (frame) Overlap, often joinery-led Joiner, sometimes alongside roofer The short version: if it’s holding up or weatherproofing the roof itself, that’s roofing work. If it’s a precisely cut, finished timber element around the edge of the roof, that’s typically where joinery comes in. It’s worth noting that this table represents general practice rather than a rigid rule that applies identically on every job. Larger renovation projects, in particular, often blur these lines somewhat, with joiners and roofers coordinating closely on overlapping areas like dormer windows or roof lanterns. Understanding the general split still helps enormously when trying to work out who to contact first. Why This Distinction Actually Matters Understanding the difference between joinery and roofing isn’t just a technicality, it genuinely affects who you should contact for a specific job, and what to expect from a quote. If your roof has a structural issue, like a leak coming from damaged tiles, sagging rafters, or a failing structural element, this needs a roofer or structural specialist, not a joiner. If your issue is with damaged, rotten, or poorly fitted fascias, soffits, or bargeboards, particularly where the timber itself needs replacing or repairing rather than the structural roof underneath, this is exactly the kind of work a joiner is well suited to handle. Getting this distinction right from the start saves time and ensures the right specialist is looking at the actual problem, rather than the wrong trade being called out for a job outside their area. There’s also a cost and scheduling benefit to understanding this properly. Calling out the wrong trade for a job, even with the best of intentions, usually just adds an extra step to the process, since that trade will typically need to identify the problem and then refer you elsewhere. Knowing roughly which category your issue falls into before making that first call can save a genuinely useful amount of time. What We Actually Do Around
What Is a Scribe in Joinery?
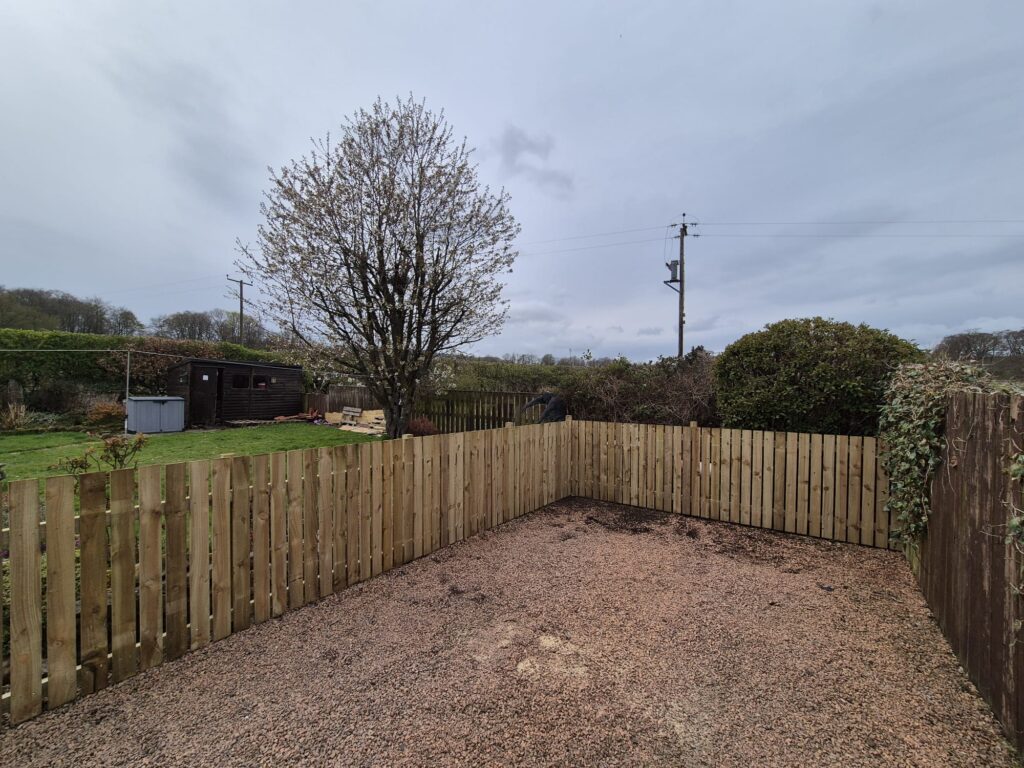
A scribe in joinery refers to both a technique and the resulting fitted line where a piece of timber is shaped to follow the exact, often uneven, contour of a wall, floor, or another surface. Rather than fitting a straight edge against a surface and leaving a gap where the wall isn’t perfectly flat, scribing involves marking and cutting the timber so it follows every dip, bump, and irregularity precisely, creating a tight, gap-free fit. At Craig Smith Joinery, scribing is something we do constantly, as a daily hand skill in our workshop, particularly on skirting, architraves, and mouldings. This guide explains exactly what scribing is, how it’s actually done, and why it makes such a difference to the quality of finished joinery. What Does “Scribe” Actually Mean in Joinery? The word scribe in joinery refers to the process of marking a line onto a piece of timber that matches the exact profile of an adjoining surface, and then cutting along that line so the timber fits snugly against it. It’s used whenever a straight, factory cut edge needs to meet a surface that isn’t perfectly flat or straight, which, in the real world, is most walls, floors, and ceilings. No wall in an actual home is perfectly straight or flat. Even in newer properties, small variations exist, and in older buildings, these irregularities can be significant, sometimes with visible dips, bulges, or slopes running along a single wall. Scribing is the technique that allows a piece of timber, cut with a straight factory edge, to be adjusted so it follows these real world imperfections precisely, rather than leaving unsightly gaps. It’s worth appreciating how universal this problem actually is. Almost every wall built using traditional plaster and masonry techniques settles slightly over time, and even the most carefully built modern property will have small variations in flatness once you look closely enough. This is why scribing isn’t a niche technique reserved for wonky old cottages; it’s a fundamental part of fitting timber into real buildings, of any age, anywhere. Why Scribing Matters So Much in Real Joinery Work This is really the heart of why scribing is such a valued, everyday skill rather than an occasional special technique. Almost every piece of fitted joinery, skirting boards, architraves, fitted wardrobes, worktops meeting a wall, has to contend with surfaces that aren’t perfectly flat or square. Without scribing, a joiner would either need to force a straight edge against an uneven surface, leaving visible gaps that let draughts through and look unfinished, or rely heavily on filler and sealant to disguise poor fit, which rarely looks as clean and doesn’t hold up as well over time. Scribing solves this properly, at the source, by shaping the timber itself to match the real contours of the surface it’s meeting. This is precisely why it comes up constantly in our day to day work, particularly on skirting, architraves, and mouldings, which run along walls and floors that are rarely, if ever, perfectly straight. It’s worth being honest that scribing is one of those skills that’s largely invisible when done well. Nobody walking into a finished room notices a tight, well scribed skirting board, because there’s simply nothing to notice; it just looks correct. It’s only when scribing has been skipped, or done poorly, that the eye is drawn to gaps, uneven filler lines, or a piece of moulding that clearly doesn’t quite sit flush against the wall. How Scribing Actually Works: The General Process Scribing follows a consistent general approach, whether it’s being used on a small piece of moulding or a longer run of skirting board. 1. Position the Timber Roughly in Place The piece of timber to be scribed is held or temporarily fixed in its approximate final position, against the wall, floor, or surface it needs to fit. 2. Set a Scribing Tool to the Widest Gap A compass or a dedicated scribing tool, with one point resting against the uneven surface and a pencil or marking point on the timber, is set to a width slightly wider than the largest gap between the timber and the surface at any point. 3. Run the Tool Along the Full Length The scribing tool is drawn steadily along the entire length of the joint, keeping one point in constant contact with the uneven surface while the pencil point transfers that exact contour onto the timber. This creates a line on the timber that mirrors every dip and bump in the surface it’s meeting. 4. Cut Precisely Along the Marked Line The timber is then carefully cut or planed along this marked line, following every variation exactly. This is the part of the process that takes real skill and patience, since cutting slightly off the line, even by a small amount, can leave a visible gap or a piece that no longer fits correctly. 5. Test-Fit and Fine-Tune The scribed piece is offered back up into position and checked for a tight fit along its full length. Small adjustments are often made at this stage, gradually removing tiny amounts of material until the timber sits snugly against the surface with no visible gaps. This final step is often where real experience shows through most clearly. Knowing exactly how much material to remove, and where, without overcutting and leaving a gap that’s now too large to correct, comes almost entirely from repetition and practice rather than anything that can be taught purely through instruction. Where Scribing Comes Up Most in Our Work Scribing is a genuinely everyday skill for us, and it shows up most often on skirting boards, architraves, and mouldings, since these pieces run directly along walls, floors, and door frames that are rarely perfectly straight. A length of skirting running along an old wall with a gentle bow in it needs to be scribed to follow that bow precisely, rather than leaving a gap that would otherwise need disguising with filler or sealant. The same applies to architraves fitted around
What Is Window Joinery?
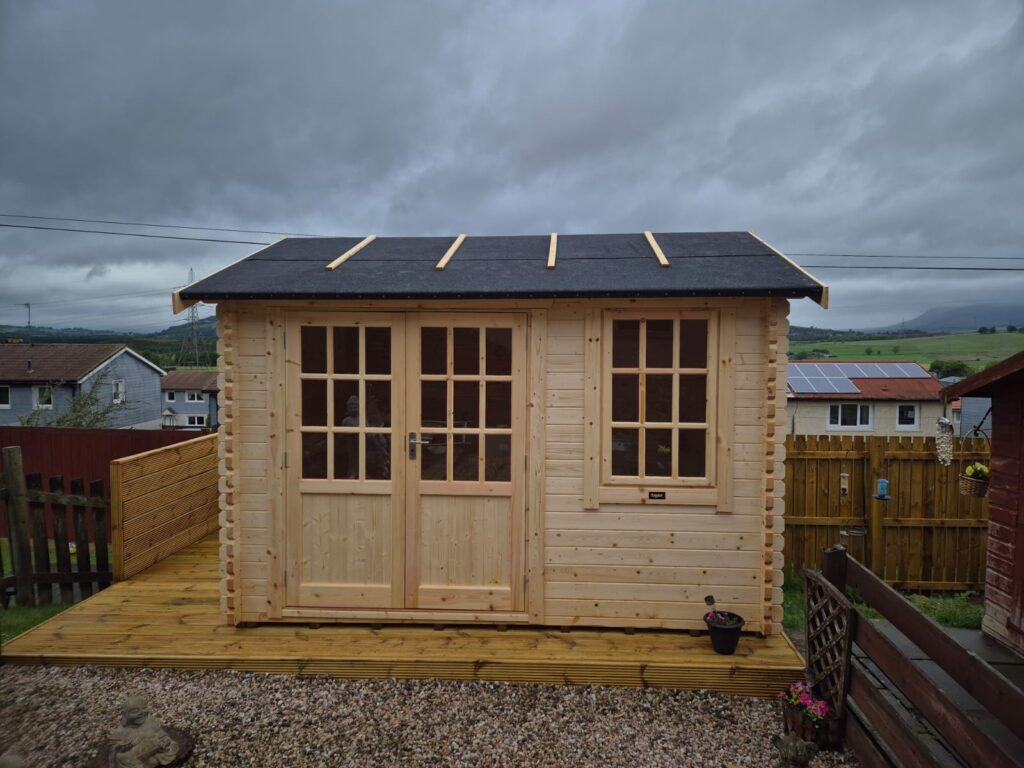
Window joinery is the craft of building, fitting, and repairing timber window frames and sashes, combining precise woodworking joints with the practical demands of keeping a window weatherproof, insulated, and smooth to operate. It covers everything from constructing brand new timber windows to restoring and repairing existing frames, and the quality of the joinery behind a window has a direct effect on how well it opens, closes, seals, and lasts over the years. At Craig Smith Joinery, window joinery is work we take on occasionally, alongside our other projects, with a particular focus on restoring and repairing existing window frames across Nottinghamshire. This guide explains what window joinery actually involves, the main window styles you’re likely to come across, and why precision fit matters just as much as the timber itself. What Does “Window Joinery” Actually Mean? At its core, window joinery is the specific branch of woodworking focused on building and maintaining timber window frames and the moving parts, known as sashes, that open and close within them. Unlike a cabinet door or a piece of furniture, a window has to do several demanding jobs at once: it needs to open and close smoothly, seal tightly against draughts and moisture when shut, support glass safely and securely, and cope with constant weather exposure on its outward facing side, all while remaining precisely fitted enough that it doesn’t stick, rattle, or let cold air through. This combination of structural woodworking, precision fitting, and weatherproofing is what makes window joinery its own specialist area, separate from general furniture or cabinet making. It’s worth pausing on just how much is being asked of a single window frame. Very few other pieces of joinery need to move smoothly, seal tightly, support weight, and withstand the weather all at once, which is exactly why a window that’s slightly out of alignment can cause so many different symptoms at the same time, from draughts through to sticking and rattling. Common Window Styles in Timber Joinery Timber windows come in several traditional and modern styles, each with its own joinery considerations. Sash Windows Sash windows are a classic style, particularly common in older and period properties, made up of one or more movable panels, sashes, that slide vertically within the frame, typically balanced with weights and cords or modern spring balances. Sash windows rely heavily on precise joinery in both the frame and the sashes themselves, since the sliding sashes need to move smoothly within tight tolerances while still sealing properly against draughts when closed. Casement Windows Casement windows are hinged at one side and open outward or inward, similar to a door. These generally rely on strong corner joints in both the frame and the opening sash, since the hinges put repeated stress on these joints every time the window is opened and closed over the years. Fixed Frame Windows Fixed frame windows don’t open at all, and are built purely to hold glass securely within a frame. While there’s no opening mechanism to worry about, the joinery still needs to be precise and weatherproof, since these frames are just as exposed to the elements as any opening window. Each of these styles brings its own particular failure points too. Sash windows tend to develop issues around the cords, weights, or the channels the sashes slide within, since these are the parts under constant repeated motion. Casement windows more commonly show wear at the hinge side, where the repeated pulling action of opening and closing gradually strains the joint over years of use. Fixed frames, having no moving parts, tend to develop problems more slowly, usually connected to weathering and seal failure around the glass itself rather than mechanical wear. Why Precision Fit Matters So Much in Window Joinery This is really the area where window joinery earns its reputation as a specialist skill, and it’s the main reason we focus heavily on restoration and repair work. A window frame or sash that’s cut even slightly out of true can cause a range of everyday problems: Getting this precision right isn’t just about smooth operation, it directly affects a home’s insulation and how well the window holds up against weather over the years. This is exactly why restoring an existing window properly, rather than just patching visible damage, makes such a difference to how it performs afterwards. It’s worth understanding that these symptoms rarely appear in isolation. A window that’s begun to swell slightly with damp, for instance, might start sticking during humid weather, then develop a draught once the swelling recedes and leaves a small gap behind. Recognising this pattern is part of what allows a proper diagnosis, rather than simply treating each symptom separately as it appears. Restoring vs Replacing: Why We Focus on Repair Many older timber windows, particularly in period properties, are built from good quality, dense timber that’s often more durable than what’s commonly used in modern replacement windows. In many cases, the frame and sash timber itself is still perfectly sound, and the issues causing draughts, sticking, or water damage come down to worn joints, failed seals, or localised rot in specific sections, rather than the entire window needing to be replaced. Restoring and repairing existing window frames allows the original, often higher quality timber and craftsmanship to be preserved, while addressing the specific joints or sections that have genuinely failed. This typically involves carefully cutting out and replacing only the damaged or worn timber, re-cutting joints to restore a precise fit, refitting seals and weatherstripping, and refinishing the frame to protect it going forward. Done well, this restores smooth, weathertight operation without losing the character and quality of the original window. This is also where a fair amount of misunderstanding tends to happen. It’s easy to assume that a window showing visible problems, peeling paint, a slightly sticking sash, some draught around the edges, must be beyond saving. In reality, these are often surface symptoms of fairly localised, fixable issues, and a proper assessment can frequently reveal
What Is Timber Joinery? A Complete Beginner’s Guide
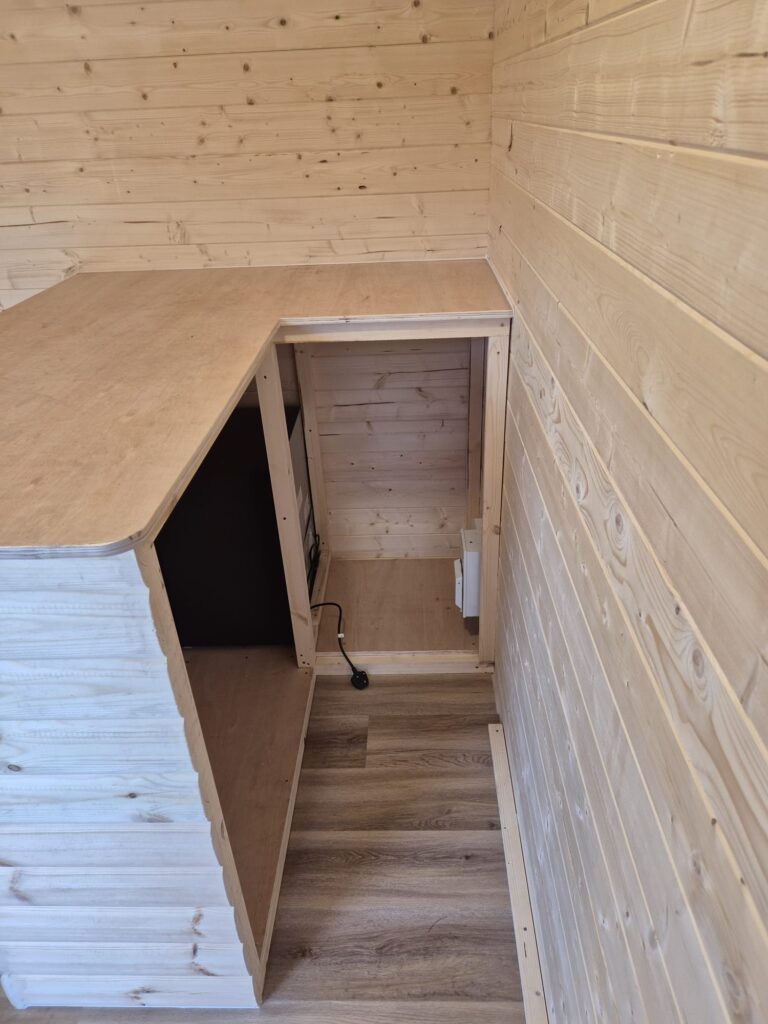
Timber joinery is the craft of building furniture, cabinets, storage, doors, and structural woodwork using wood, connected together with specific joints designed to hold under the stresses each piece will face. The term brings together two things that both matter enormously to the final result: the timber chosen for the job, and the joinery methods used to connect the pieces together. Get either one wrong, and even a beautiful-looking piece can fail well before it should. Whether you’re a complete beginner curious about what timber joinery actually involves, a DIYer weighing up your options, or someone about to hire a joiner for the first time, this guide covers the basics clearly, without jargon. At Craig Smith Joinery, we’ve spent 30 years matching the right timber and the right joint to the right job across Nottinghamshire, and this piece breaks down exactly what that means in practice. What Does “Timber Joinery” Actually Mean? At its simplest, timber joinery is any process of connecting pieces of wood together to build something that functions as one solid, reliable structure. This covers a huge range of work, from a simple shelf joined with a couple of dowels, right through to a complex staircase or a fine piece of bespoke furniture built with dozens of individual joints. The word “timber” specifically points to the material itself, wood, as opposed to metal, plastic, or manufactured boards like MDF or plywood. Timber has properties that genuinely affect how it should be joined: it expands and contracts with temperature and humidity, it has a natural grain direction that affects its strength in different directions, and different species of timber vary considerably in hardness, durability, and how well they take different types of joints. Understanding this properly makes a real difference to how you approach any woodworking project, whether you’re commissioning a piece or trying to understand a quote. Timber isn’t a uniform material the way, say, steel or plastic can be. Each piece has its own grain pattern, moisture content, and quirks, which is exactly why timber joinery has developed so many different joint types over the centuries, each suited to a slightly different combination of timber behaviour and structural demand. Why Timber Choice Matters as Much as the Joint Itself This is one of the most overlooked parts of timber joinery for anyone new to it: the timber you choose has just as much impact on the final result as the joint used to connect it. A perfectly cut joint in the wrong timber for the job can still fail, while a well-chosen timber gives even a simple joint a much better chance of lasting. Hardwood vs Softwood: The Basics Timber is broadly split into two categories, and understanding the difference helps make sense of why some furniture costs more than others. Hardwoods come from broadleaf, slower growing trees like oak, ash, walnut, and beech. They’re generally denser, more durable, and better suited to fine furniture, joints that need to hold significant weight, and pieces expected to last for generations. Hardwoods typically cost more, reflecting both the slower growth of the trees and the extra effort involved in working with denser material. Softwoods come from faster growing conifer trees like pine, spruce, and fir. They’re generally lighter, more affordable, and easier to work with, making them popular for simpler furniture, structural framing, and projects where cost matters more than maximum durability. Softwoods can still be perfectly strong and long lasting when used appropriately, but they’re generally softer and more prone to denting or wear over time compared to hardwoods. Neither category is universally “better.” The right choice depends on what the piece needs to do, how much wear it will face, and the budget available for the project. A well-built softwood shelf can outlast a poorly built hardwood one, since good joinery and timber choice work together rather than one compensating for the other. It’s also worth knowing that hardwood and softwood aren’t strict indicators of appearance or colour, which is a common misconception. Some softwoods, like certain pines, can be quite pale, while some hardwoods can also be relatively light in tone. The hardwood and softwood distinction is really about the type of tree and its growth characteristics, not how the finished timber looks or feels to the touch. The Main Types of Timber Joints Once the right timber is chosen, the next question is which joint suits the job. A handful of joints come up again and again across most furniture, cabinets, and storage projects. Dowel Joints A dowel joint connects two boards using small round wooden pegs, glued into matching drilled holes. It’s a reliable, cost effective choice commonly used for cabinet carcasses and shelving, and when made with accurately aligned holes and good glue coverage, it’s strong enough for the vast majority of everyday furniture. Biscuit Joints A biscuit joint uses small oval shaped wooden discs, glued into curved slots cut into each board. It’s particularly good at keeping panels perfectly aligned while glue sets, making it a common choice for wardrobe sides, tabletops, and cabinet panels, and it’s quicker to make than many alternatives, which helps keep costs reasonable on larger projects. Mortise and Tenon Joints A mortise and tenon joint is one of the strongest and most established joints in timber joinery. One piece has a slot cut into it, the mortise, and the other has a matching tongue shaped to fit, the tenon, glued or pegged into place. This joint handles twisting and pulling forces particularly well, which is why it’s the standard choice for chairs, tables, door frames, and anything load bearing or frequently stressed. Beyond these three, there are naturally many other joints suited to specific situations, from dovetails for drawers to interlocking Japanese-style joints for feature pieces. But dowels, biscuits, and mortise and tenon cover the vast majority of everyday furniture, cabinet, and storage work, which is why they’re worth understanding first if you’re new to the topic. A Quick Comparison of Timber and Joint Choices
What Is External Joinery? A Guide to Woodwork Built for the Outdoors
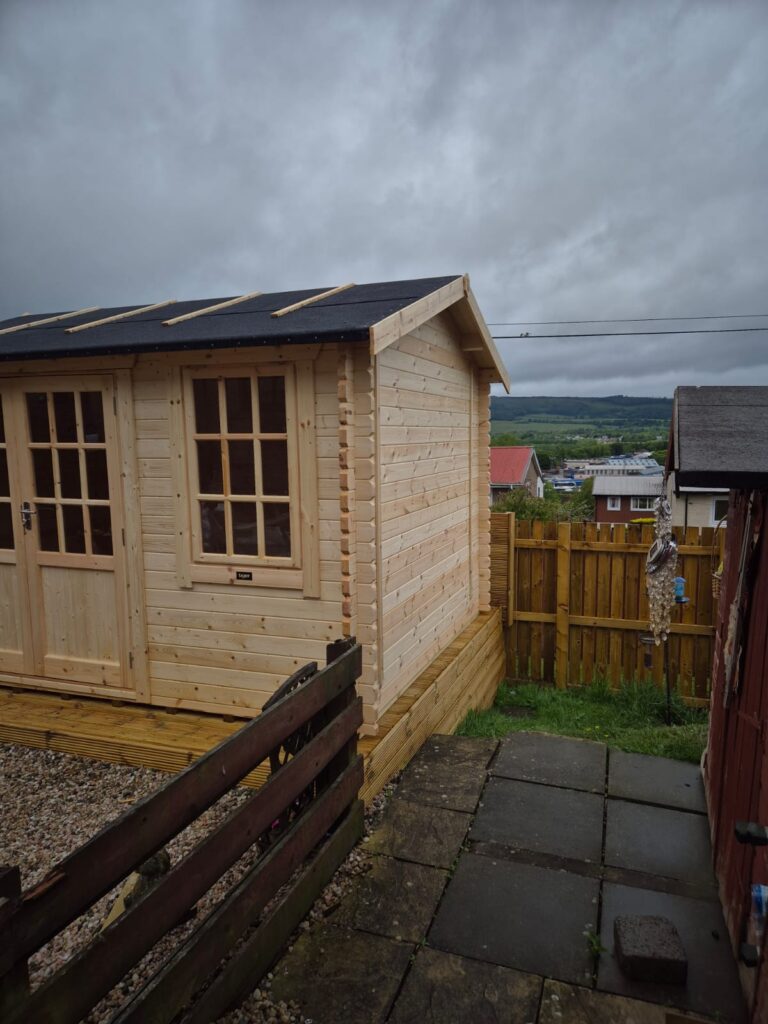
External joinery is woodwork designed and built specifically to be used outside a building, exposed to weather, temperature changes, and moisture on a daily basis. It includes things like external doors, windows, cladding, fascias, and soffits, anything made from timber that faces the elements rather than sitting safely inside a heated, sheltered home. Because of this exposure, external joinery needs different timber choices, treatments, and construction methods compared to joinery built for indoor use. At Craig Smith Joinery, external joinery is work we take on occasionally, alongside our core internal work, covering a mix of external doors, windows, and cladding-type elements across Nottinghamshire. This guide explains what external joinery actually is, how it differs from internal joinery, and why the right approach here matters far more for long-term value than it might first appear. What Makes Joinery “External”? The clue is in the name: external joinery covers any wooden element built to be fitted outside a building, or in a position where it’s regularly exposed to the weather. This includes: This is quite different from internal joinery, cabinets, wardrobes, staircases, and fitted furniture, which lives inside a heated, relatively stable environment and never has to deal with rain, direct sun, or freezing temperatures. It’s worth noting that some elements sit closer to the boundary between the two categories than others. A porch canopy, for example, is technically sheltered from direct rain in some designs, but still experiences the same temperature swings and general weathering as fully exposed timber. Understanding exactly how exposed a given piece will be is genuinely the starting point for deciding how it should be built. Why External Joinery Needs a Different Approach This is really the heart of what separates external joinery from everything else we build. Wood exposed to the outdoors faces a genuinely tough set of conditions that indoor furniture simply never experiences: Internal joinery never has to withstand any of this. A wardrobe or kitchen cabinet lives in a stable, controlled environment for its entire life. An external door or window faces all of the above, every single day, for as long as it’s expected to last, which is often decades. It’s worth pausing on just how much cumulative stress this represents. A piece of internal furniture might experience mild seasonal humidity changes inside a heated home, but an external door goes through daily wetting and drying cycles, direct sun exposure that can raise surface temperatures well above the surrounding air, and repeated freezing and thawing through the colder months. None of these individual events is dramatic, but repeated year after year, they’re exactly what separates external joinery that lasts decades from a piece that starts failing within a handful of years. How External Joinery Differs From Internal Joinery It’s worth being clear about this, since the differences run deeper than just “put outside instead of inside.” Timber choice is one of the biggest differences. Internal joinery can often use a wider range of timbers, chosen mainly for appearance, cost, and workability, since they won’t face weather exposure. External joinery generally needs timber that’s naturally more resistant to moisture and decay, or timber that’s specifically treated to cope with these conditions, since a beautiful but unsuitable timber choice outdoors can lead to rot and damage within just a few years. Treatment and finishing matter far more for external work too. Internal furniture might simply need a decorative finish for appearance. External joinery needs a finish that actively protects against moisture, UV damage, and temperature swings, often requiring specific weatherproof paints, stains, or preservative treatments, reapplied periodically to maintain protection over the years. Joint design and construction also has to account for more movement. Because external timber expands and contracts more significantly with weather changes than internal timber does, joints need to allow for this movement without failing, cracking, or letting moisture penetrate at weak points. This often means more robust, carefully designed joints than would be necessary for an equivalent internal piece. Drainage and weatherproofing become genuinely important considerations too. External doors and windows need proper detailing to shed water away from vulnerable joints, rather than allowing it to pool or seep into the timber, which is a consideration that simply doesn’t exist for internal furniture. Beyond these core differences, there’s also the question of how a piece will be inspected and maintained over its life. Internal furniture is largely a “build it and forget it” proposition, whereas external joinery genuinely benefits from occasional checks, particularly around joints, seals, and any areas where water could realistically collect. Building this expectation into a project from the start, rather than treating maintenance as an afterthought, is part of what separates external joinery built to last from external joinery built to simply look good on installation day. Why Long-Term Value Matters So Much for External Joinery This is really the main point worth understanding if you’re considering external joinery for your home. Low-cost external fixtures, particularly mass-produced doors, windows, or cladding using unsuitable timber or minimal weatherproofing, often look perfectly fine when first installed. The real difference shows up years later, when poorly suited external joinery starts showing signs of rot, warping, or paint failure, sometimes within just a handful of years, while properly built external joinery, using the right timber and finish for the job, continues performing well for decades. This is a classic case where the upfront cost doesn’t tell the whole story. External joinery built properly the first time, with the right timber, treatment, and construction, genuinely represents better long-term value than a cheaper option that needs replacing or extensively repairing well before its time, even though the initial price tag looks more appealing. It’s a bit like comparing two coats bought for the same winter. One might look identical to the other on the shop rail, but only one is actually built with the right materials to keep out genuine cold and wet weather over several seasons. The difference isn’t visible until the conditions actually test it, and by then, replacing
How to Paint Aluminium Joinery: A Practical Step-by-Step Guide
Painting aluminium joinery, window frames, door frames, and other aluminium fittings, is entirely possible, but it needs a different approach to painting wood. Aluminium is naturally smooth and non-porous, meaning paint doesn’t grip it the same way it grips timber, so proper preparation is the difference between a paint job that lasts for years and one that starts peeling within months. This guide walks through exactly how to paint aluminium joinery properly, whether you’re doing it yourself or deciding if it’s a job worth hiring a professional for. We’ll also touch on how aluminium differs from wood joinery, since understanding that difference explains why the process looks the way it does. Why Aluminium Joinery Needs a Different Approach to Wood Before getting into the steps, it helps to understand why aluminium behaves so differently to timber when it comes to painting. Wood is porous, meaning paint and primer can soak slightly into the surface fibres, creating a strong mechanical bond. Aluminium is completely non-porous and naturally smooth, which means paint sits purely on the surface rather than gripping into it. On top of that, aluminium often has a factory-applied coating or natural oxide layer that actively resists adhesion, which is exactly why skipping preparation steps leads to paint peeling or flaking far sooner than it would on wood. Aluminium joinery is also generally more resistant to rot, warping, and moisture damage than wood, which is one of the reasons it’s popular for windows and doors in the first place. But that same smooth, weather resistant surface is precisely what makes proper surface preparation so essential before paint will actually stick to it long term. It’s worth understanding, too, that this isn’t just a theoretical concern. The vast majority of failed aluminium paint jobs we see or hear about come down to preparation being rushed or skipped entirely, rather than a poor quality paint being used. In other words, the paint itself is rarely the weak link. The surface it’s being asked to grip onto usually is, unless it’s been properly prepared first. What You’ll Need Before starting, gather the right materials for the job: Having everything ready before you start matters more than it might seem. Once you begin sanding and degreasing a section, you don’t want to be stopping halfway through to find the right grade of sandpaper or realise the primer you bought isn’t actually designed for metal. Laying everything out in advance also makes it easier to work through each frame methodically, rather than rushing steps because momentum has already been lost. Step-by-Step: How to Paint Aluminium Joinery 1. Clean the Surface Thoroughly Start by washing the aluminium down with mild detergent and water to remove dirt, grime, and any general surface residue. Rinse well and allow the surface to dry completely before moving on. Any dirt or grease left behind will sit underneath the paint and cause it to fail early, so this step is worth doing properly rather than rushing through it. 2. Degrease the Surface Even after washing, aluminium often holds onto invisible traces of grease or oils, particularly around handles, hinges, or areas that get touched frequently. Wipe the surface down with a degreasing solution or methylated spirits on a clean cloth. This step is easy to skip, but it makes a real difference to how well the primer bonds afterwards. 3. Lightly Sand the Surface Using fine grit sandpaper or an abrasive pad, lightly key the surface all over. You’re not trying to remove material, just create a slightly roughened texture that gives the primer something to physically grip onto, since a perfectly smooth surface gives paint very little to hold on to. Wipe away any dust afterwards with a clean, dry cloth. 4. Mask Off Areas You Don’t Want Painted Use painter’s tape to carefully mask off glass, rubber seals, hinges, and any hardware you want to protect from paint. Aluminium window and door frames often have seals nearby that shouldn’t be painted over, since this can affect how well they function afterwards. 5. Apply an Etch Primer This step is the one people skip most often, and it’s usually the reason a paint job on aluminium fails early. A specialist etch primer is designed specifically to bond to smooth, non-porous metal surfaces, effectively giving your topcoat paint something reliable to hold onto. Apply it in thin, even coats following the manufacturer’s instructions, and allow it to fully cure before moving on. 6. Apply Your Topcoat Paint Once the primer has properly cured, apply your chosen exterior metal paint in thin, even coats, allowing proper drying time between coats as specified by the manufacturer. Two thin coats generally give a more durable, even finish than one thick coat, which can crack or peel more easily over time. 7. Allow Full Curing Time Before Use Even once the paint feels dry to the touch, it often needs longer to fully cure and reach its proper hardness and durability. Avoid heavy use, cleaning, or exposure to harsh weather during this curing period if possible, since paint is generally more vulnerable to damage before it’s fully hardened. Patience at this final stage matters more than people expect. It can be tempting to treat a frame as finished the moment it’s dry to the touch, but full curing is a genuinely separate process from surface drying, and the two shouldn’t be confused. Rushing use or cleaning during this window is one of the more common, avoidable reasons a fresh paint job ends up marked or damaged within its first few weeks. Common Mistakes That Cause Paint to Fail on Aluminium Mistake Why It Causes Problems Skipping the degreasing step Grease residue prevents primer from bonding properly Not sanding the surface Paint has nothing to physically grip on a smooth surface Using a standard wood or wall primer These aren’t designed to bond with metal and will fail early Applying paint in cold or damp conditions Poor curing leads to a weaker, less durable finish
What Is Bench Joinery?
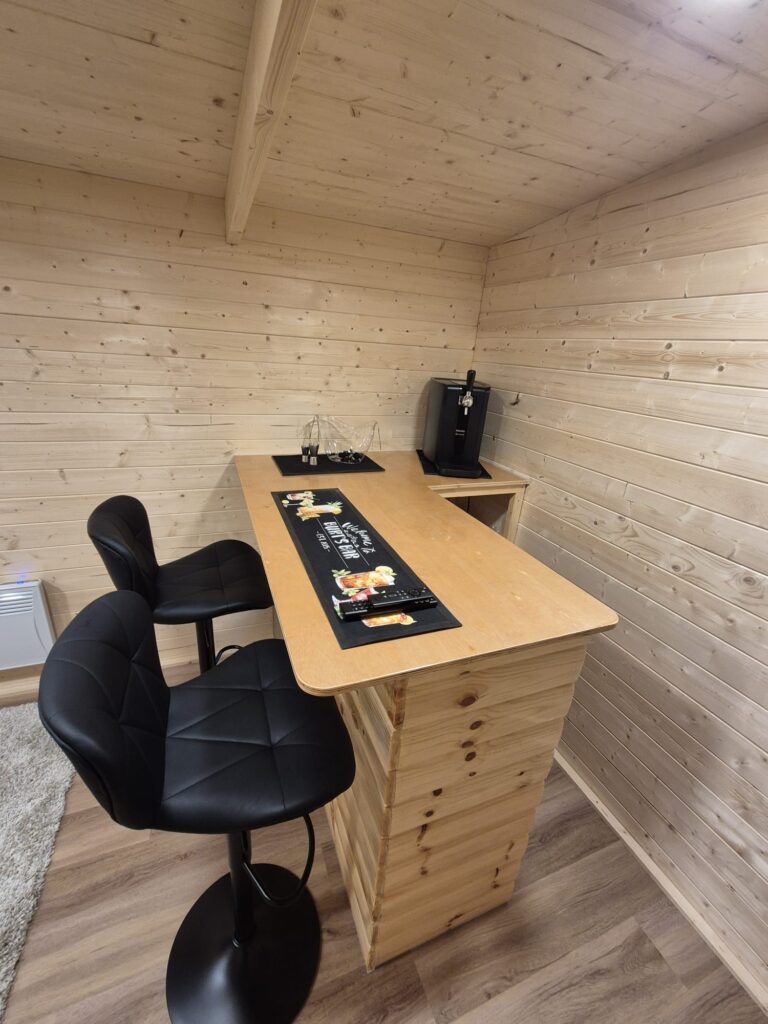
Bench joinery is the craft of building high-quality wooden items, doors, windows, cabinets, and fine furniture, at a workbench in a controlled workshop, rather than being built or assembled on-site. It’s called “bench” joinery because the work is carried out at a fixed workbench using precision tools, allowing far tighter control over accuracy, finish, and quality than is generally possible working on a building site. At Craig Smith Joinery, bench joinery sits alongside our site and architectural work, and it comes into play across a mix of everything we build, from bespoke cabinetry through to doors, frames, and fitted storage components. This guide explains what bench joinery actually is, how it differs from site joinery, and why the skill of a trained bench joiner matters so much to the quality of a finished piece. What Does “Bench Joinery” Actually Mean? The term bench joinery refers specifically to joinery work carried out at a workbench, in a workshop environment, as opposed to work done directly on a building site. This might sound like a simple distinction, but it’s actually one of the most important divides in the joinery trade, because the environment a piece is built in has a huge effect on the level of precision that’s realistically achievable. In a workshop, a bench joiner has access to a stable, flat, permanent work surface, properly set up machinery, consistent lighting, and controlled conditions free from weather, dust, and the general disruption of an active building site. This allows for a level of accuracy and fine detail that’s simply harder to achieve when working on-site, where conditions are less predictable and time pressures are often different. It’s worth adding that this isn’t only about the physical environment. A workshop also allows a joiner to plan out a whole piece properly before cutting a single joint, laying out components, checking measurements against each other, and spotting potential problems long before assembly begins. That kind of preparation is much harder to replicate under the time pressure of an active site. Bench Joinery vs Site Joinery: What’s the Real Difference? It’s worth explaining this clearly, since the two terms often get used loosely, but they describe genuinely different types of work. Site joinery, sometimes called site carpentry, involves work carried out directly at the location where the finished piece will live, fitting skirting boards, hanging doors, building staircases in place, or fixing architectural features directly into a property. This work has to adapt to the real conditions of a building, including uneven walls, existing structures, and the practical realities of working around an occupied or partially finished space. Bench joinery, by contrast, involves building the piece itself, a door, a cabinet, a window frame, a piece of fine furniture, at a workbench in the controlled environment of a workshop, before it’s transported and fitted or installed on-site. The joints, the precision cutting, and the fine detail work all happen at the bench, away from the unpredictability of a live site. In practice, most real joinery projects involve both. A bench joiner builds the piece to a high standard of accuracy in the workshop, and then site work is needed to actually fit or install it correctly into the building. The best results come from getting both halves right, precise bench-made components, fitted properly on-site. It’s a useful distinction to keep in mind when discussing a quote with any joiner, since the two skill sets aren’t automatically interchangeable. A tradesperson who is excellent at fitting work on a live site doesn’t necessarily have the same fine, unhurried precision that bench work demands, and the reverse is equally true. Why the Workshop Environment Makes Such a Difference This is really the heart of what makes bench joinery valuable, and it comes down to a few practical realities: None of this means site work is lower quality. Site joiners have their own specialist skills for fitting and adapting work to real buildings. It simply means bench joinery is where the finest, most precise joint-cutting work tends to happen, before the piece ever reaches site. It’s also worth pointing out that consistency across a project depends heavily on this stability. If several cabinet doors or drawer fronts are all cut on the same calibrated machinery, in the same workshop, under the same conditions, they’ll match each other far more reliably than if each one had to be produced under slightly different circumstances on a live site. Why the Skill of a Trained Bench Joiner Matters A workshop environment alone doesn’t guarantee good results. It’s the combination of the right environment and a genuinely skilled bench joiner that produces work worth talking about. A trained bench joiner brings: This is really what separates genuinely skilled bench joinery from simply “furniture that’s been put together.” The same wood, the same workshop, and even the same tools can produce very different results depending on the experience and care of the person actually doing the work. This is also where training and years of repetition genuinely show. A newer joiner might be able to cut an individual joint accurately given enough time, but the difference with an experienced bench joiner is speed combined with consistency, producing dozens of matching, precisely fitted components without each one needing extra correction along the way. Where Bench Joinery Fits Into Our Work We take on bench joinery occasionally, alongside our site and architectural work, and it shows up across a genuine mix of what we build. Bespoke cabinetry and fine furniture are almost always built primarily at the bench, since the level of precision required for cabinet doors, drawers, and fitted internal components benefits enormously from a stable workshop environment. Doors, windows, and frames often start as bench joinery too, built accurately in the workshop before being transported and fitted on-site. Components for fitted storage projects are frequently built at the bench as well, particularly the more detailed elements, before being brought together and installed in the final space. This mix reflects how most real joinery
What Is Architectural Joinery? A Guide to Woodwork Built Into Your Home
Architectural joinery is woodwork that becomes a permanent, structural part of a building rather than a standalone piece of furniture. It includes things like staircases, built-in window seats, fitted panelling, alcove units, and other features that are fixed directly into the walls, floors, or structure of a property. Because this joinery becomes part of the building itself, it needs to be built with structural strength and long term safety in mind, not just good looks. At Craig Smith Joinery, architectural joinery is work we take on regularly, with a particular focus on built-in features like window seats, panelling, and alcove units across Nottinghamshire. This guide explains what architectural joinery actually is, how it differs from furniture joinery, and why structural strength matters so much more when woodwork becomes a permanent part of a home. What Makes Joinery “Architectural”? The word architectural is the key here. Architectural joinery isn’t something you could pick up and move to another room, or take with you if you moved house. It’s built into the structure of the building, fixed to walls, floors, staircases, or ceilings, and designed to remain there for the life of the property. This includes things like: This is quite different from furniture joinery, which produces standalone pieces like wardrobes, tables, and cabinets that exist independently of the building around them. It’s worth noting that the line between the two isn’t always perfectly sharp. A large fitted wardrobe, for instance, sits somewhere in between: it’s built to fit a specific space precisely, but doesn’t carry the same structural or safety responsibilities as a staircase or a load-bearing built-in seat. Understanding where a piece sits on that spectrum is genuinely useful when discussing a project, since it shapes how much of the work needs to focus on structural fixing versus pure craftsmanship. How Architectural Joinery Differs from Furniture Joinery It’s worth explaining this clearly, since the two are often confused, and the difference genuinely changes how the work needs to be approached. Furniture joinery builds standalone pieces, designed to be freestanding or simply fitted into a room without becoming part of the building’s structure. A wardrobe, for example, needs to be strong enough to support its own contents and stay square over time, but it doesn’t need to bear the weight of people walking on it, or contribute to the structural integrity of the house. Architectural joinery, on the other hand, is fixed permanently into the building and often needs to handle far greater demands. A staircase has to safely support the weight of people using it every single day for decades, hold up under repeated impact and movement, and meet specific safety standards. A built-in window seat needs to be securely fixed to the wall or floor structure so it can’t come loose or shift over time. This is joinery that becomes part of how the building itself functions and stays safe, which is a very different responsibility to building a piece of furniture that simply sits in a room. This distinction also affects how a project is planned from the very start. Furniture can often be designed almost entirely in the workshop, based on measurements taken from the room. Architectural joinery, by contrast, usually demands a much closer working relationship with the building itself, since the woodwork has to account for the walls, floors, and structure it’s being tied into, quirks and all. Why Structural Strength and Safety Matter So Much Here This is really the heart of what separates architectural joinery from other joinery work. Because these pieces are permanently fixed into a home and often support real, repeated weight and movement, the joints and fixings used need to be built to a much higher standard of long term structural reliability. A few reasons this matters so much: This is why we approach architectural joinery with a real focus on getting the structural fundamentals right first, before anything else about the design or finish comes into play. It’s tempting to think of a built-in feature purely in terms of how it will look once finished, but the visible surface is really the last part of the process. Everything underneath has to be resolved first, since there’s no easy way to go back and reinforce a structural element once the finished panelling is in place. Built-In Features: Where Our Focus Sits While architectural joinery covers everything from staircases to skirting boards, our particular focus is on built-in features, window seats, fitted panelling, and alcove units that become a permanent part of a room’s design. These pieces sit in an interesting space between furniture and structure: they need the fine craftsmanship and design sensibility of good furniture making, combined with the secure, long term fixing methods of structural joinery. A built-in window seat, for example, needs to be securely fixed to the surrounding wall and floor structure so it can safely support the weight of people sitting on it for years without loosening, while also fitting the exact dimensions of the window recess and matching the character of the room. A fitted panelling project needs joints and fixings that will hold flat and secure against the wall for decades, resisting any movement in the underlying wall structure over time. Alcove units need to be built to fit a specific recess precisely, often around chimney breasts or uneven older walls, while still being properly secured rather than simply pushed into place. This is often where the appeal of a built-in feature lies for homeowners too. A well designed window seat or alcove unit can make a room feel like it was always meant to include that feature, rather than something added afterwards, and that effect only really works if the joinery underneath is solid enough to disappear from thought entirely once it’s finished. How Joints Work Differently in Architectural Joinery The joints used in architectural work often need to do two jobs at once: join pieces of wood together, and also securely fix the whole structure to the building itself. This
What Is Kitchen Joinery? A Complete Guide to How Kitchens Are Properly Built
Kitchen joinery is the craft of building kitchen cabinets, units, and fitted storage using specific woodworking joints, rather than simply screwing flat panels together. It covers everything from the cabinet carcass to the doors, drawers, and worktops, and the joinery methods used have a huge impact on how well a kitchen copes with daily use, heat, and moisture over the years. At Craig Smith Joinery, kitchen joinery is a core part of what we do, and we specialise in fully bespoke kitchen cabinets and units built across Nottinghamshire. This guide explains what kitchen joinery actually involves, why it matters more than people expect, and how it compares to the flat pack kitchens most people are used to. What Does “Kitchen Joinery” Actually Mean? At its core, kitchen joinery is the process of building the wooden structure of a kitchen, cabinets, carcasses, doors, and fitted units, using proper woodworking joints designed to handle the specific demands a kitchen places on furniture. A kitchen isn’t like a bedroom wardrobe or a living room shelf. It faces daily temperature changes from cooking, regular exposure to steam and moisture, constant opening and closing of doors and drawers, and the general wear of being one of the busiest rooms in the house. This is exactly why kitchen joinery deserves its own conversation, separate from general furniture or cabinet making. The joints holding a kitchen together need to cope with conditions that most other furniture never has to deal with. It’s also worth remembering that a kitchen is used in a fairly unforgiving way compared to most other rooms. Doors and drawers get opened with wet hands, worktops get knocked, and cabinets often carry genuinely heavy loads, from crockery to small appliances. None of this is dramatic on its own, but it adds up steadily over years of daily life, which is precisely why the underlying joinery needs to be built with that reality in mind from the very start. Why Kitchen Joinery Matters More Than People Expect Most people judge a kitchen by its doors, worktops, and handles, the parts you see and touch every day. But the joinery behind those surfaces is often what determines whether a kitchen still looks and functions well after ten or twenty years, or starts sagging, loosening, and swelling within a few. Heat from cooking, steam from kettles and dishwashers, and the daily opening and closing of doors and drawers all put real strain on cabinet joints over time. A kitchen built with the right joinery handles this without issue. One built with weak joints, or the wrong joint in the wrong place, tends to show problems exactly where you’d expect: doors that start to drop, drawers that stick, or panels that separate slightly at the seams after a few years of steam and temperature changes. It’s a bit like judging a car by its paintwork alone. The finish tells you almost nothing about what’s happening underneath, and a kitchen that looks identical to another on installation day can age in completely different ways depending on how it was actually put together. What Kitchen Joinery Actually Involves A kitchen is made up of several distinct parts, and each one places different demands on the joinery used to build it. Cabinet Carcasses The carcass is the main box structure of each cabinet, the sides, base, and top that everything else attaches to. This needs to stay perfectly square and rigid for years, supporting the weight of everything stored inside, plus the doors and any worktop above. Carcasses are commonly built using dowel joints, since they keep panels well aligned and provide solid, dependable strength for this kind of structural support. We’ve covered dowel joint strength in more depth in another guide, if you want the full picture. Doors and Frames Kitchen doors face constant daily movement, opening and closing hundreds of times a month, plus the stress of hinges pulling on the frame over years of use. This is exactly the kind of repeated, twisting stress that calls for a stronger joint. Mortise and tenon or Domino joints are typically used here, since they resist the twisting forces of constant hinge use far better than a simpler glued joint would over the long term. Drawers Drawers face similar daily stress to doors, plus the weight of whatever’s stored inside them, pulled forward and pushed back repeatedly. Well built kitchen drawers use joints designed specifically to resist this pulling motion at the corners, keeping the drawer box square even under regular heavy use. Panels and Infills Flat panels, such as decorative end panels or infill pieces that tidy up gaps between units, generally face less structural stress than carcasses or doors. These are often a good fit for biscuit joints, since alignment and a clean, flat finish matter more here than raw strength, and biscuits keep the assembly process efficient without sacrificing the durability this part of the kitchen actually needs. Beyond these four core areas, worktops and any exposed shelving also need thought given to how they’re joined and supported, particularly around sink cutouts and hob areas where heat and moisture are concentrated. These details rarely get discussed when people picture “kitchen joinery,” but they’re exactly the kind of decisions that separate a kitchen built to last from one that only looks good on installation day. Why Kitchens Specifically Need Joinery That Handles Heat and Moisture Kitchens are one of the toughest environments in a home for wood and joinery to survive long term, for a few clear reasons: This is exactly why we choose joints for kitchen work based on how each part of the kitchen will actually be used, rather than defaulting to whatever’s fastest or cheapest throughout the whole build. A joint that’s perfectly adequate in a bedroom wardrobe might simply not be built for the combination of heat, steam, and daily handling that a kitchen delivers, day in and day out, for decades. Kitchen Joinery vs Flat Pack Kitchens Feature Bespoke Kitchen Joinery Flat Pack